Zabbix is an enterprise-level open source distributed monitoring solution. It has been designed to monitor and track the performance and availability of network servers, virtual machines, and other IT resources.
Zabbix agent is a network service that needs to be installed on all monitored servers in order to gather data about them and forward it to the Zabbix server.
Step 1 –Turning SELinux off
CentOS 8 comes with SELinux enabled by default. To keep Zabbix running smoothly, you can disable the SELinux to use it properly.
To activate Zabbix, disable the ‘SELinux’ system. To do so, go to the configuration file.
nano /etc/selinux/config
Set SELINUX to disabled. Change the following line:
SELINUX=disabled
Type CTRL, O to save changes. Type CTRL, X to close the file. Reboot your server to apply changes
Step 2 – Installing Zabbix Agent
The Zabbix agent packages are not available in CentOS 8 by default. So first, we’ll need to add the Zabbix repository first.
It is worth noting that Zabbix 5.0 was released recently, but you can install the previous version (4.4) by running the following command:
dnf install https://repo.zabbix.com/zabbix/4.4/rhel/8/x86_64/zabbix-release-4.4-1.el8.noarch.rpm
For Zabbix 5.0
rpm -Uvh https://repo.zabbix.com/zabbix/5.0/rhel/8/x86_64/zabbix-release-5.0-1.el8.noarch.rpm
After installing yum repository packages in our system. Use the following command to install the Zabbix agent on your CentOS 8 or RHEL 8 systems using the package management tool.
dnf install zabbix-agent
or
yum install zabbix zabbix-agent
Press ‘Y’ for any confirmation to complete the installation process.
Step 3 – Configure Zabbix Agent
To finish configuring the Zabbix agent, you need to edit the configuration file to add the IP address of your Zabbix server.
nano /etc/zabbix/zabbix_agentd.conf
#Server=[zabbix server ip]

#Hostname=[ Hostname of client system ]

Server=10.10.10.10
ServerActive=10.10.10.10
Hostname=Server name
The first two of them must contain the IP address of the Zabbix server, and the Hostname is the name of this client that will be displayed in statistics on the server.
Step 4 –Firewall configuration
Open the 10050, 10051, http,https ports for Zabbix to work. You can allow them with the following command:
firewall-cmd --add-service={http,https} --permanent

firewall-cmd --add-port={10051/tcp,10050/tcp} --permanent

firewall-cmd --reload
Step 5 – Start Zabbix Agent
Your Zabbix agent service is enabled to start automatically. Run the following commands to restart the service on boot:
systemctl enable zabbix-agent

systemctl start zabbix-agent
To stop the Zabbix-agent service anytime, run this command:
systemctl stop zabbix-agent
To restart the service.
systemctl restart zabbix-agent
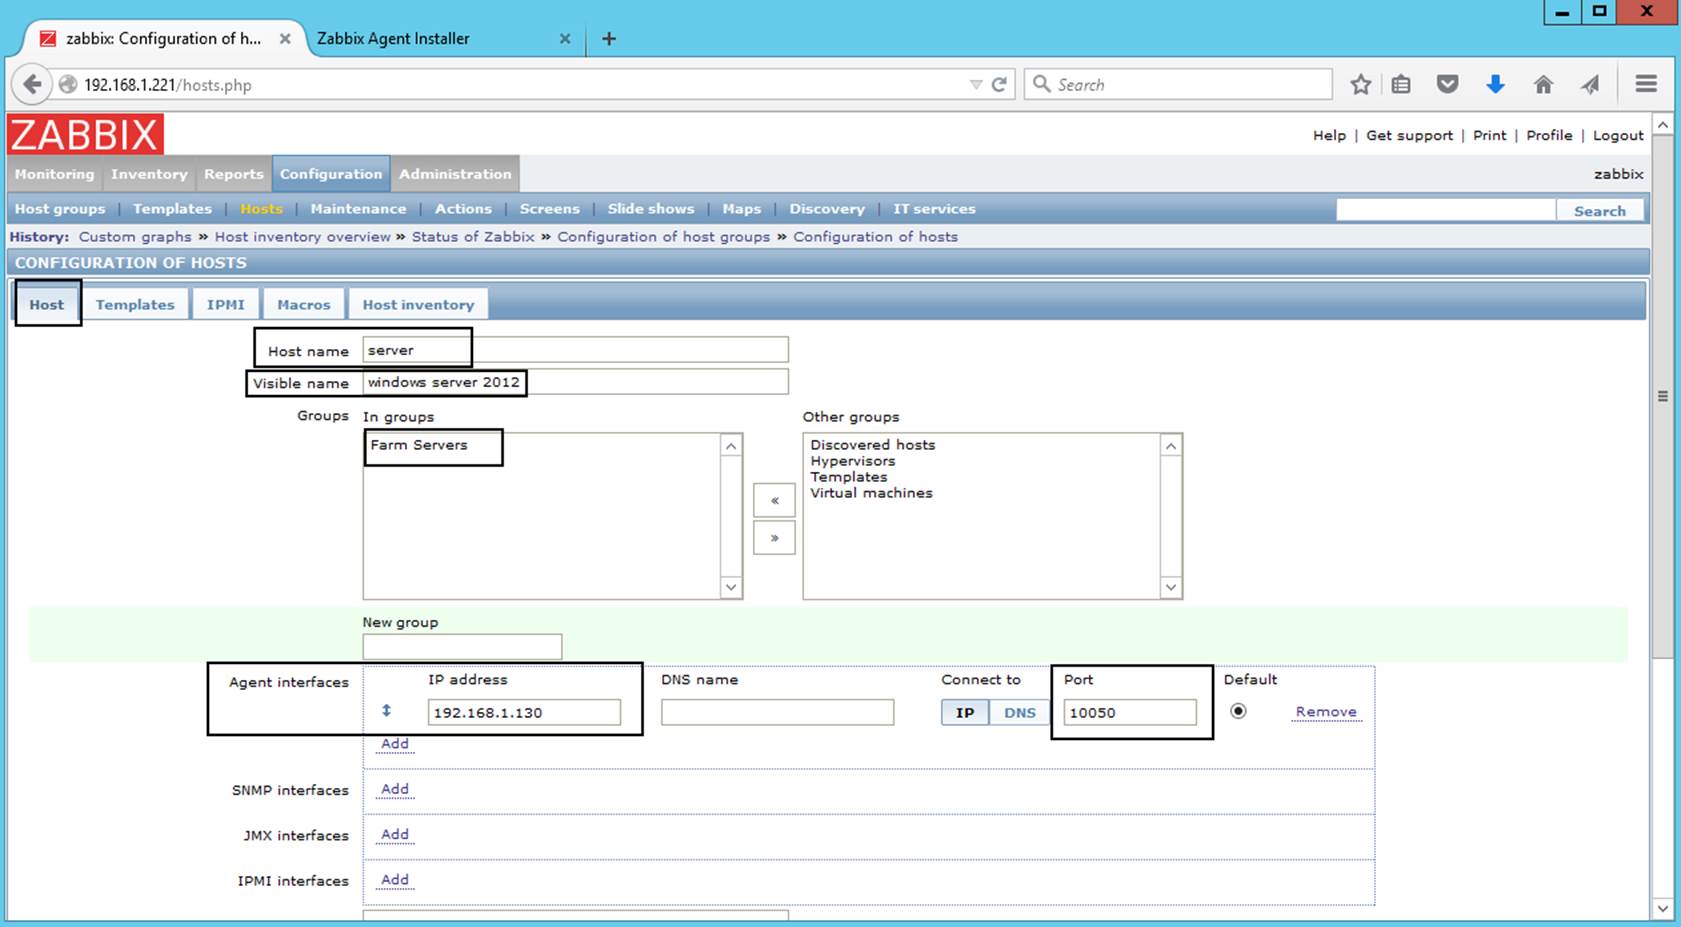
Congratulations! You have successfully installed the Zabbix agent on this server. Now we’ll need to add a host to our Zabbix server.